Showing posts with label Dies. Show all posts

Sunday, August 31, 2014

I'm Back!!!.....I think.

I can't believe it's been this long since I posted anything to my blog.  I had hand surgery in July.  I spent most of June preparing for the surgery...meaning, getting the house ready as I knew I wouldn't have the use of my right hand for a while.  Now, with August at an end I am almost fully recovered.  I still have a hard time picking and lifting things up with my right hand.  But, the hand is doing much better.  I can't believe how frustrating this has been...you don't realize just how much you use your right hand until you can't!!! LOL!!!

To celebrate the return to the land of crafting, I thought I would make a card for the A Muse Studio Consultant Challenge for the month of August.  The theme for this month's challenge is "Hey Mister".  For me, coming up with a masculine card is difficult....it's so natural for me to create flowery or cutsie cards.  

Here's the card I made:


It's an elongated card (8" x 4").  All of the images are from the Sea Shell stamp set.


I created the background using the coral image in Fern.  Then, I used Memento Tuxedo to stamp the other images.  Using Square Nesties Dies, I cut the images and the French Roast layers. I used Tombow Markers (850 Shell, 942 Latte, 912 Nutmeg) to color the images.  After putting the layers together, I finished off the card by adding some French Roast Pearls.

That's it for now.  Maybe I'll find some time to make some more masculine cards this evening.  

Hope everyone is having a fun and safe Labor Day weekend....where did the summer go??????


See the 2014-2015 catalog HERE.
 
Blessings

Sunday, May 25, 2014

Reorganizing my die collection

I think I spend more time organizing my craft supplies than actually using them. LOL!!!

A couple years ago, I shared how I organized my dies (posted here) using binders and magnetic vent covers:


Well, I have come up with a different method for storing and organizing my die collection.  I'm still going to use the binder method for storing my Spellbinders dies.  I'm using the new storage method for various single, thin dies.

I started off by making my own plastic pockets.  I looked at buying the clear pockets, but 1) they didn't make them in the size I needed and 2) it got to be quite expensive for how many I needed.

How did I make my own clear pockets?   Answer....By using my Foodsaver and regular sized sheet protectors.  You can buy a box of 100 sheet protectors from Office Depot for less than $20.  I happened to buy mine at a garage sale for a couple bucks. ETA: I used the heavy weight sheet protectors.


 I started off by cutting off the hole punched edge.  I cut the sheet protectors to the size I wanted which gave me a set of 4 per sheet.  I used the Foodsaver to seal the edges.  They turned out like this:


I cut magnetic vent covers to fit into the pockets.  


I categorized the dies and placed them into a card rack.  I found this card rack at a local craft store's warehouse sale a couple weeks ago.  I thought it was a steal at $10.


What I like about this new storage system is that they are categorized by theme, the rack spins and I can just flip through them to find the die I need.  This is so much easier than going through binder after binder to find the right die.  Originally, I was storing them by company but it made more sense to store them by theme.  I printed labels with the names of the company and die and adhered them to the back of each set.

Many of you probably don't own a card rack or don't have the space for one.  Another option would be use plastic bins to store the die pockets:

    
Small plastic Bin                              Split Plastic Bin


Jennifer McGuire uses them for her die storage:


I'm off to finish reorganizing my dies.  It's amazing how many dies I have collected!!  Maybe with this new and improved storage system, I'll be inclined to use them. LOL!!


ETA: Here are the categories I used:
Winter (including Christmas)
Home
Floral
Nature (clouds, rain, etc)
Elements (flourishes, doilies, shapes, etc)
Cover Up
Animals
Butterflies (I seem to love collecting butterfly dies that I have to have it as a category!! LOL)
Bugs/Insects
Food
Holidays (Vday, Easter, Halloween, etc)
Celebrations (Birthday, graduation, etc)
Sea (shells, waves, seaweed, etc)
Other (cars, handbags, fire hydrant, hot air balloon, cityscapes....basically anything that doesn't fit the above categories)

Hope this helps with getting your dies organized. :)


Blessings,

Sunday, April 20, 2014

Happy Easter - mini coffee cup treats

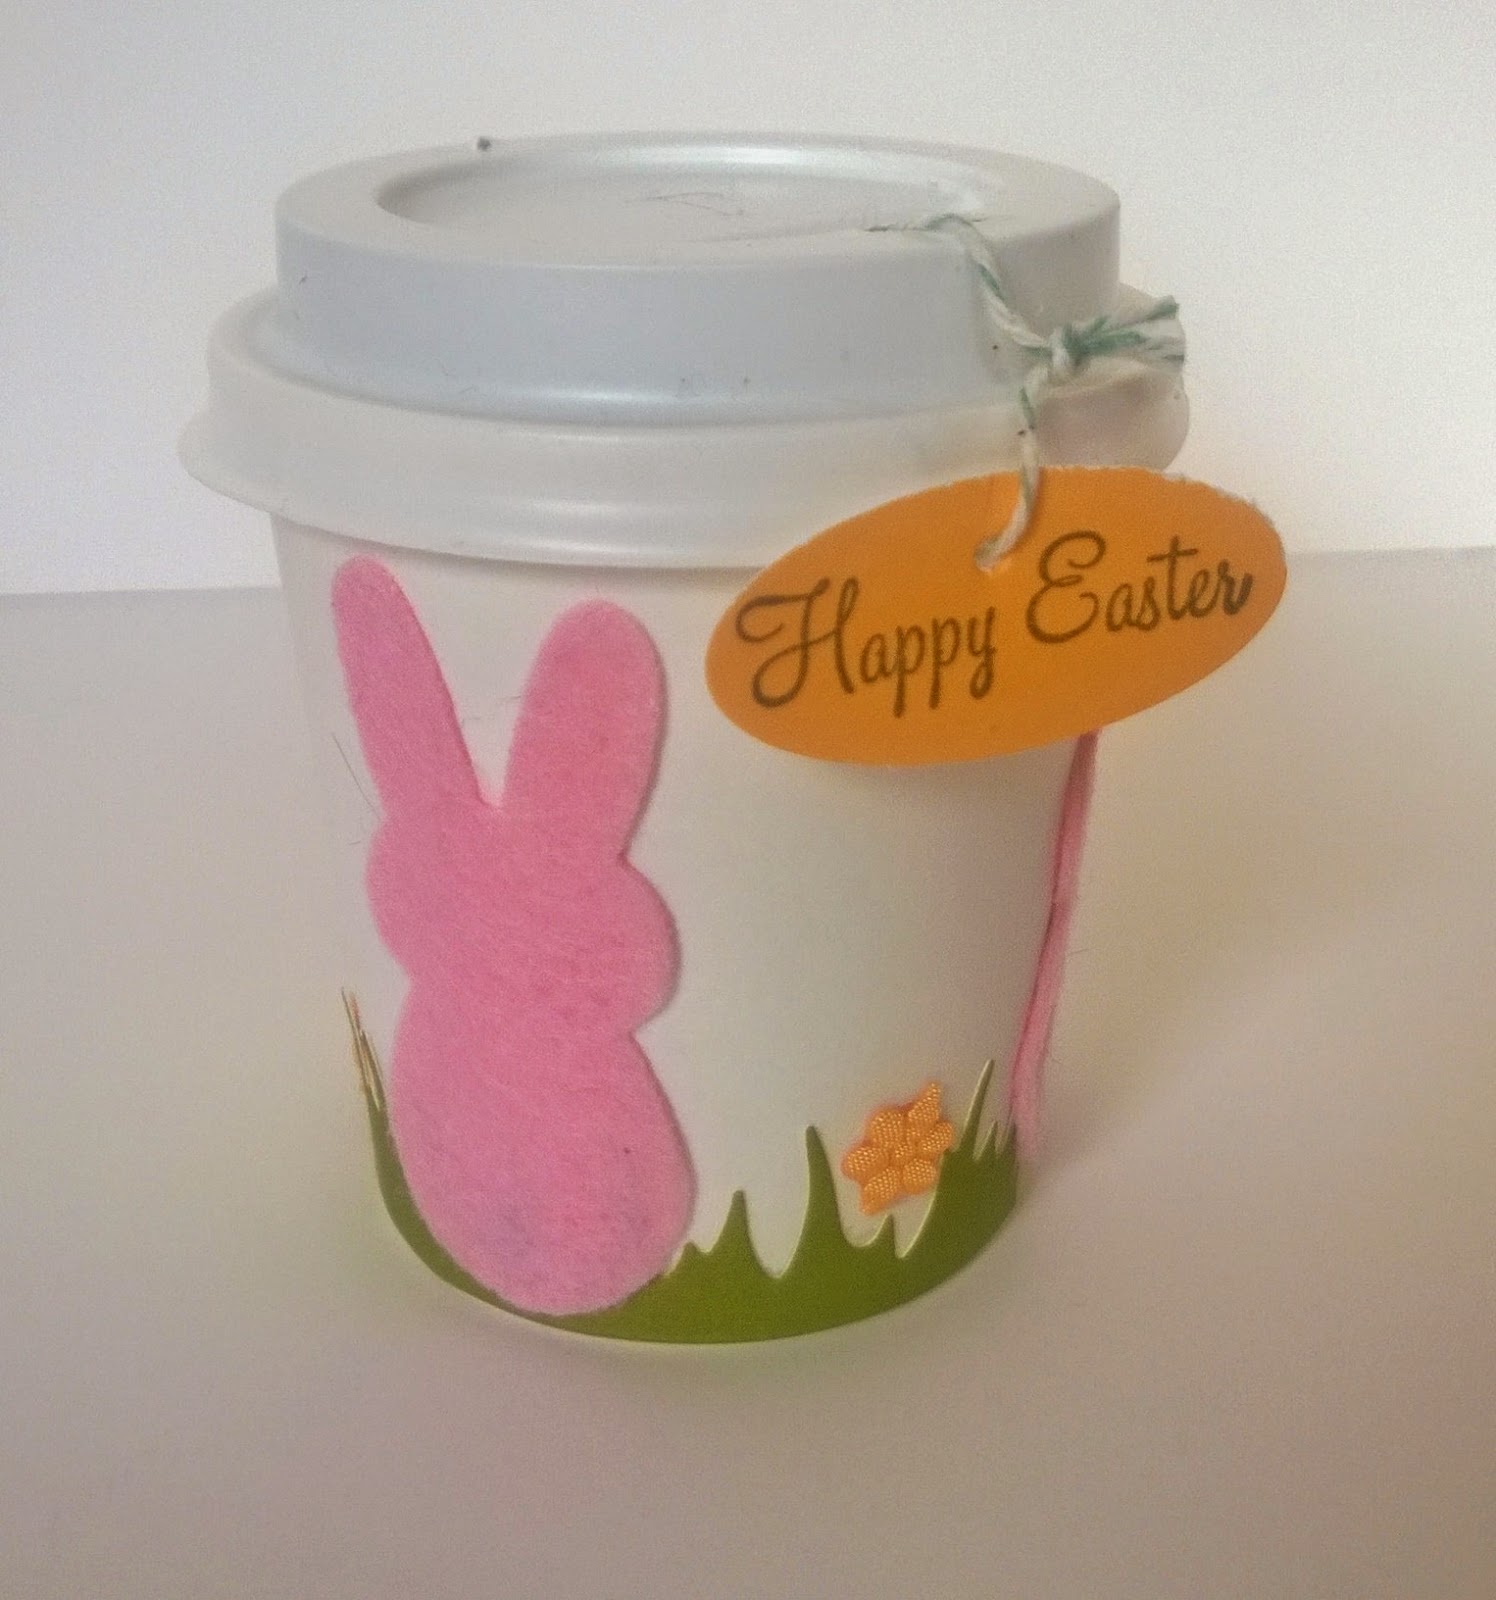
While I didn't dye and decorate any eggs this year, I did made these adorable Easter treats.


When I was shopping at a local scrapbook store, I found these mini coffee cups.  Aren't they just the cutest!?!?!!?!?


It didn't take long to make about 60 of these darling treats...once I had all of the piece cut out.  I used a candle holder that I bought from IKEA to organize my pieces.


All I had to do was adhere the pieces to the tiny cups.  Then, I filled them with chocolate goodies.  I had a hard time not eating the entire bag of Sixlets!!! LOL!!


I finished it by adding a little "Happy Easter" tag with twine to the lid.


Even Kittie wanted a taste of the goodies. 


Supplies used:

Happy Easter sentiment from                       Bunny die set                                                   Grass Die
Egg-stravaganza stamp set

              
Bubblegum Felt                       Grass cardstock                  Papaya cardstock            Memento Tuxedo Black Ink


Papaya Tiny Flowers ribbon
(retired)


Easter blessings to you all.


Tuesday, August 20, 2013

Fantastic projects from 2013 Holiday Catalog & freebies on a|s Facebook!!

Have you seen the A Muse Studio 2013 Holiday Catalog yet?!!?!?!  My wish list gets longer and longer each time I browse the catalog!  You can view the holiday catalog HERE.

A Muse Studio is having a fantastic giveaway on their Facebook page.  You can win your favorite item from the holiday catalog.  Check out the details HERE.

Here are some projects from the holiday catalog that were featured on A Muse Studio's Facebook page:


You can see these projects and more on A Muse Studio's Facebook page
 
Reminder:  I can't believe that August is almost at an end.  Where did the summer go?!?!?!?  Remember, the August Spotlight Special ends August 31, 2013 at 11:59PM.  The specials can be seen on this   post.
 
Here are some projects using this month's spotlight special:


Feel free to contact me at bjlee717"at"comcast"dot"net if you have any questions or would like to place an order.


Sunday, June 24, 2012

Washi Tape Magnets

With recent graduations and baby showers, I found myself not having enough magnets for my fridge!!!  The solution I came up with was making my own magnets.  


I had some left over pieces of magnetic sheets that I used to make my binder for storing dies (post about that here).  I figured if dies could cut through chipboard, it could cut through these magnetic sheets.


I covered the backside of the magnetic sheet with Washi Tape.


I made sure that I had enough coverage with the die of my choice.


Run it through a die cutting machine and you get these.

  
Here they are on my fridge.

Just a note:  these magnetic sheets aren't very strong.  But as you can see, with using 2 of them to hold the picture up, it worked.  

Blessings,

Sunday, February 12, 2012

Organizing Dies (and reinkers recap)

I had a few people ask me to post something about how I organize my dies.  I've tried several methods, but I'm loving how I have my dies organized now.


I bought several Univenture 3-ring 1.5" binders when they were on clearance ($1.09 per binder...wish I had bought more!!!).  The outside dimensions are 7" x 9 3/8" x 1 1/4".


 You can find magnetic vent cover sheets at your local hardware store (Home Depot, Lowes, Ace Hardware, etc).  As you can see, they come in packs of 3 that are 8" x 15".  I bought mine at Home Depot for less than $5 per pack.  Much more economical than buying the smaller packs of magnet sheets at the craft stores.


 I bought a few binder panels from Joann Fabric and Craft Store.  You can find these panels elsewhere online.  I try to wait until they are on sale and use Joann's free shipping coupon.  I buy the full sheet panels (sale price $5.39) and then cut them in half.   You get twice as many than buying the half size panels....you would have to punch your own holes and have extra holes on the bottom.   (You can also use chipboard or thick acetate).


I cut the magnetic sheet into strips.  You can cut them however you want (like covering the entire panel).  You could just use the magnetic sheet without the panel, but I find it too flimsy/bendy.  By cutting them into strips, I get more out of them.  I used double sided tape to adhere them to the binder panel.  


 Of course, having 2 strips of magnet isn't "pretty".  So, I covered them with white cardstock.  I corner punched each corner on one edge to match the binder panel.  Again, I used double sided tape to adhere the cardstock to the binder panel, covering up the magnets.  For my Spellbinders nesties binders, I used designer paper to cover up the binder panel....I like the clean look of the white cardstock though.


With the a|s dies that come with templates, I created a pocket on the back of the binder panel by using some thick acetate.  Now, they won't fall out and get lost.


I organized my binders by theme:  shapes, frames, 3-D, borders, etc.  The Univenture binders come with a clear cover, so you can design your own cover.  I just labeled the spine with the theme.  


I'd love to see how others organize their dies....please leave a comment with either a link or description. 


Thanks for visiting.


Blessings,


ETA:  Also, someone asked me about how I store my ink refills.  I found these storage containers at IKEA.....love to shop at IKEA!!!  They are the Krus containers and these were $4.99 each.  They are the perfect size for a|s refills (too small for SU refills).