Showing posts with label Treats. Show all posts

Thursday, August 27, 2015

A Muse Studio 2015 Holiday Sneak Peeks

Just a few more days before the Holiday Catalog is unveiled!!!!
 
 
Here are some sneak peeks......you can see the full countdown on A Muse Studio's Blog:


Sunday, July 26, 2015

Better Late Than Never

I truly apologize for being SO tardy in posting about the new A Muse Studio Catalog.  This summer has been crazy busy.
 
 
You can see the new catalog HERE.
 
As always, if you order is $150 or more please contact me at bjlee717"at"comcast"dot"net in order to receive your hostess benefits.  Otherwise, you may order directly through by webstore HERE.
 
A Muse Studio came out with some great samples using some of the new products:
 
Shirt and Tie Candy Packages
 
Keep Calm Candy Bar
 
 
Special Teacher Card


My World is Brighter Card
 
 
ABC Favor Boxes
 
Apple Tag


Please feel free to email me at bjlee717"at"comcast"dot"net if you have any questions. 
 
Have a great rest of the summer....can't believe it's already the end of July!!!!
 
 
Blessings,


Friday, February 13, 2015

Valentine Treat and Organizing Embellishments

Happy Friday the 13th!!! :)
 
 
For Valentine's Day treats, I made these adorable mice treat toppers. 
 
 
I used a couple hearts from the Spellbinders Classic Heart Nestabilities to make the body and ears.  The cardstock is A Muse Studio Blush and Stampin' Up Real Red.  I just folded the large heart in half to make the body.
 
Nestabilities Die Set - Classic Heart
 

The eyes and nose are from just a regular hole punch.  I colored the eyes with a Copic marker.  The whiskers were made using the handle part of a Memory Box bucket die.  And the face (where the whiskers would come out of) was stamped using A Muse Artstamps Heart Trio and Cherry Ink.  The sentiment is from Stampin' Up Teeny Tiny Wishes.


I slipped in the top part of the packaging of the Gilliam Candy Stick into the body and adhered it with glue dots.  You could use Dum Dum lollipops as treats, too.


I wanted to share how some of my embellishments are stored.  I bought this storage carousel at a garage sale a couple years ago.  It came with all of the containers.  They are exactly the same size as Stampin' Up embellishment containers.  The unit sits on a base that allows it to spin.
 
Unfortunately, when I bought the carousel it didn't come in the original box so I don't know who the maker is and if it's even available for purchase.  I would love to find another one for all of the embellishments that I'm hoarding....LOL!!!  I also have a couple of the Stampin' Up Stack & Store Caddy for my SU brads and buttons.
 
Available HERE
 
 
Have a great weekend and Happy Valentine's Day!!


Sunday, September 21, 2014

A Muse Studio September Creative Challenge

The theme for September's challenge is 

 Frightful & Delightful

What's actually frightful is that summer is coming to an end (we've had excellent summer weather in Seattle this year...today was sunny and beautiful with temps in the low-80s) and that I'm already seeing Halloween AND Christmas decorations in the stores!!!

I love to make treats for Halloween.  Here's a cauldron filled with Delightful treats.


I made the cauldron template freehand.  It took a few tries to come up with it, but I like how it turned out.  I thought about adding a handle, but decided to leave it the way it was.


I used Onyx cardstock for the cauldron.  I used the negative side of the Grass Border Die to make the fire from Papaya and Poppy cardstock.  The Happy Halloween sentiment is from the Say It With Style set stamped on Grass Cardstock.

I'll be handing these out for treats at the office.  


Hope everyone enjoyed their weekend.  Have a great week!!


Blessings,


Sunday, April 20, 2014

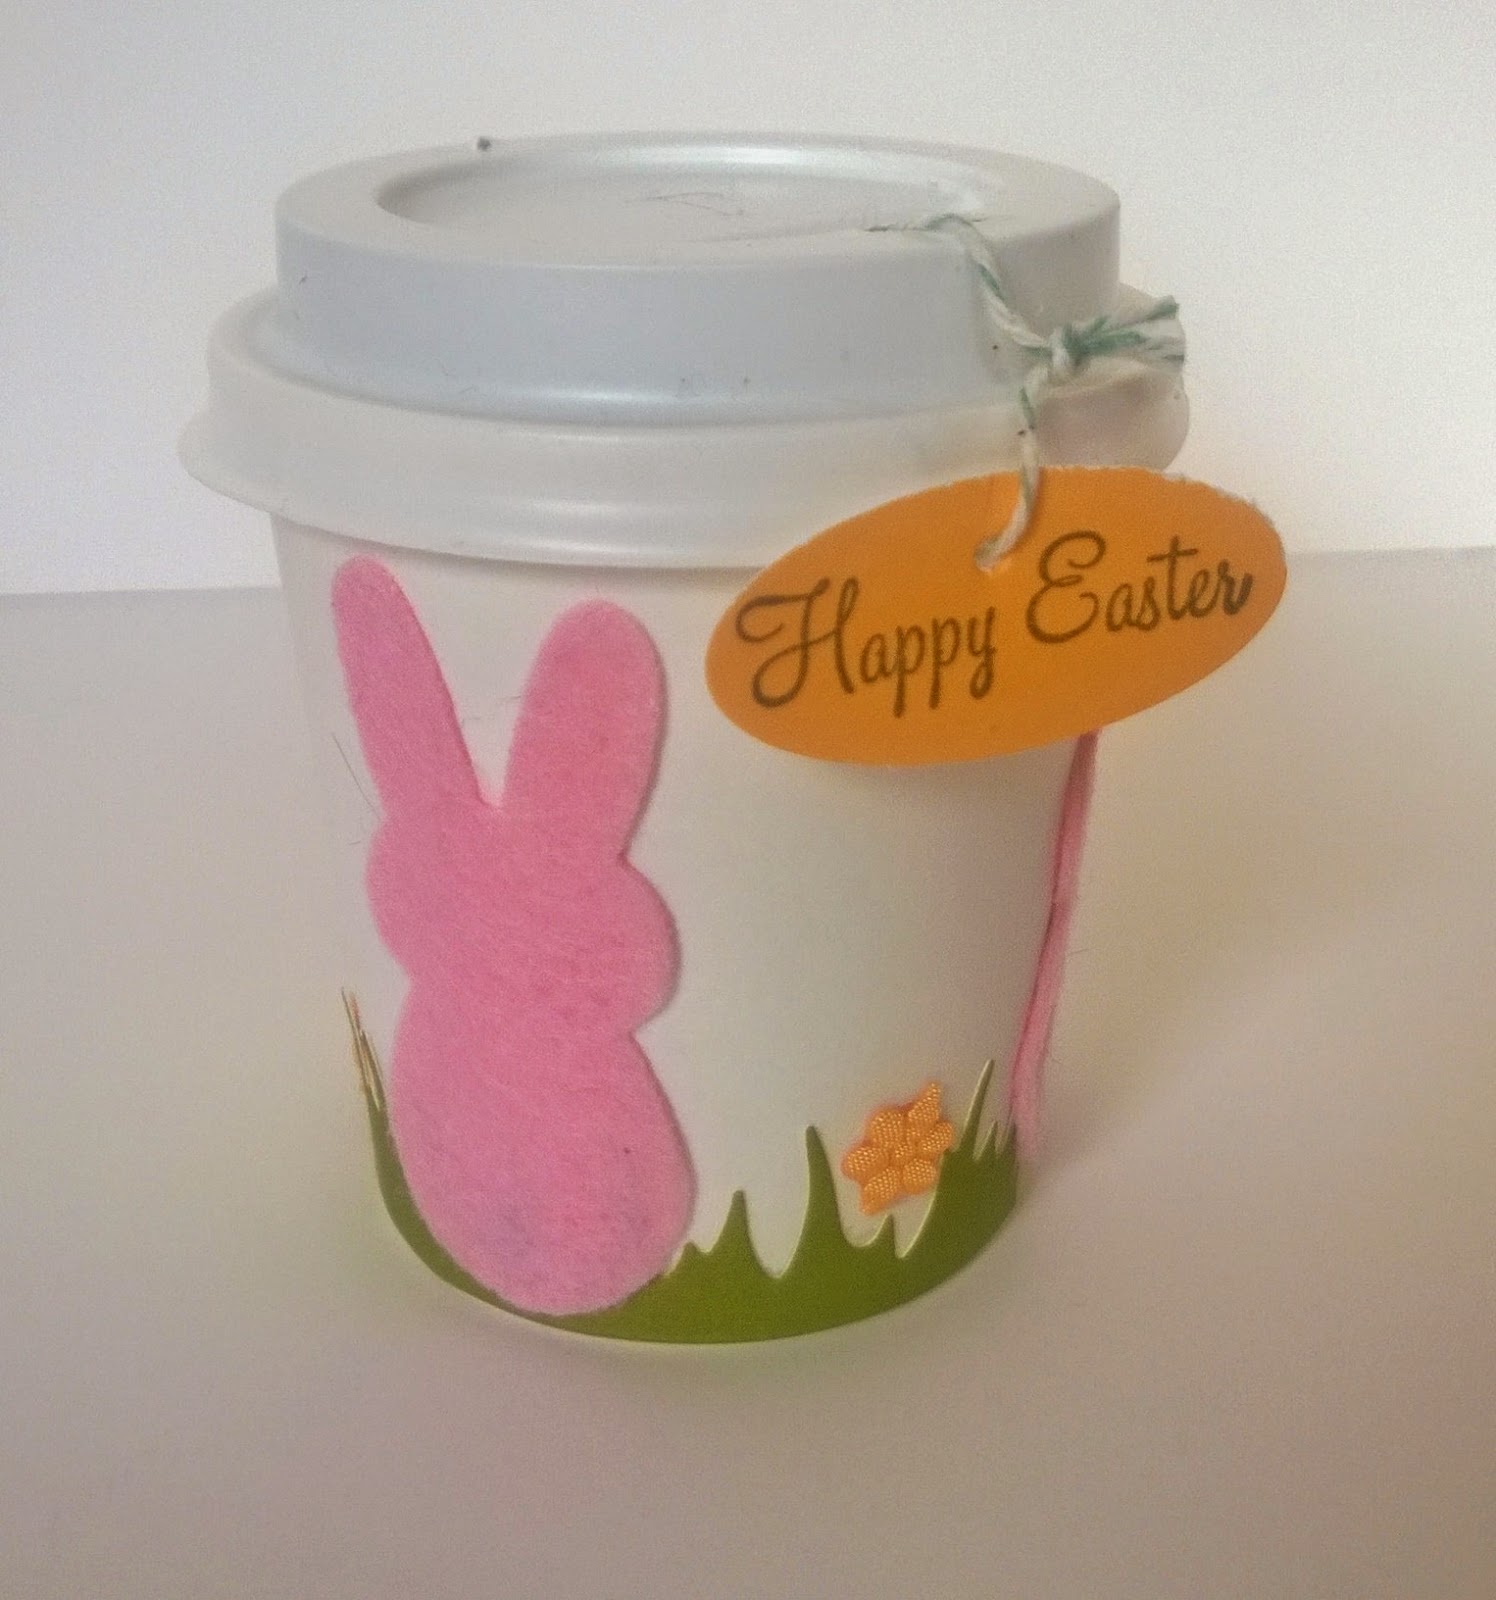
Happy Easter - mini coffee cup treats

While I didn't dye and decorate any eggs this year, I did made these adorable Easter treats.


When I was shopping at a local scrapbook store, I found these mini coffee cups.  Aren't they just the cutest!?!?!!?!?


It didn't take long to make about 60 of these darling treats...once I had all of the piece cut out.  I used a candle holder that I bought from IKEA to organize my pieces.


All I had to do was adhere the pieces to the tiny cups.  Then, I filled them with chocolate goodies.  I had a hard time not eating the entire bag of Sixlets!!! LOL!!


I finished it by adding a little "Happy Easter" tag with twine to the lid.


Even Kittie wanted a taste of the goodies. 


Supplies used:

Happy Easter sentiment from                       Bunny die set                                                   Grass Die
Egg-stravaganza stamp set

              
Bubblegum Felt                       Grass cardstock                  Papaya cardstock            Memento Tuxedo Black Ink


Papaya Tiny Flowers ribbon
(retired)


Easter blessings to you all.


Tuesday, December 24, 2013

Christmas Treats

I had so much fun with this year's Christmas treats.  First, let me share with you the Gift Card Holders I made.

Just before Thanksgiving, I stopped in at Starbucks to treat myself to a Caramel Macchiato.  That's when I saw these cuties.


Isn't it adorable????  I just had to use these for gifts at the office this year.  

I used this tutorial to make these gift card holders.


The lid pulls out to reveal the gift card.


I used a variety of products: A Muse Studio cardstock (cherry, sugar, kraft), Stampin' Up Confetti Cream cardstock (retired), Stampin' Up Christmas Punch stamp set and matching punch, May Arts ribbon, double-sided adhesive and foam adhesive.

(I made one change to the tutorial when making my holders: instead of using a 4 1/4" x 1" white piece, I used a 4 1/4" x 2" piece and folded it in half.)

Everyone just loved these Gift Card Holders.  

My second Christmas Treat were Santa mugs filled with hot chocolate goodies.  


I first made these to send to the A Muse Consultants who participated in my Recipe and Calendar swaps as a "thank you" treat.  Then, I ended up making more to share with friends and family.  I ended up making 55 of these adorable mugs.


I made all of the templates for the different pieces to the mug (mug, face, beard, mustache).  The hardest part was tracing and cutting each piece.  It would have been a cinch if I had an electric cutter, which is on my Christmas wishlist. :)
Then, it was just a matter of adhering all of the pieces together.  Sticky tape just wasn't strong enough to keep the mug adhered together.  Unfortunately, I didn't find this out until after I shipped the ones to the consultants.  I ended up using Aleene's Tacky Glue and it did the job. 


The mug piece needed to be cut from a 12x12 piece of cardstock.  I was able to get 2 mugs per cardstock.  I used an unknown red cardstock from Stampin' Up.  The pieces for the face were cut from A Muse cardstock (sugar, shell, onyx shimmer).  I used punches to make the eyes and nose.  I also used an oval punch to make the hole in the handle.

That's it for now.  I really need to get some presents wrapped.  

Wishing everyone a very Merry Christmas, filled with many blessings.