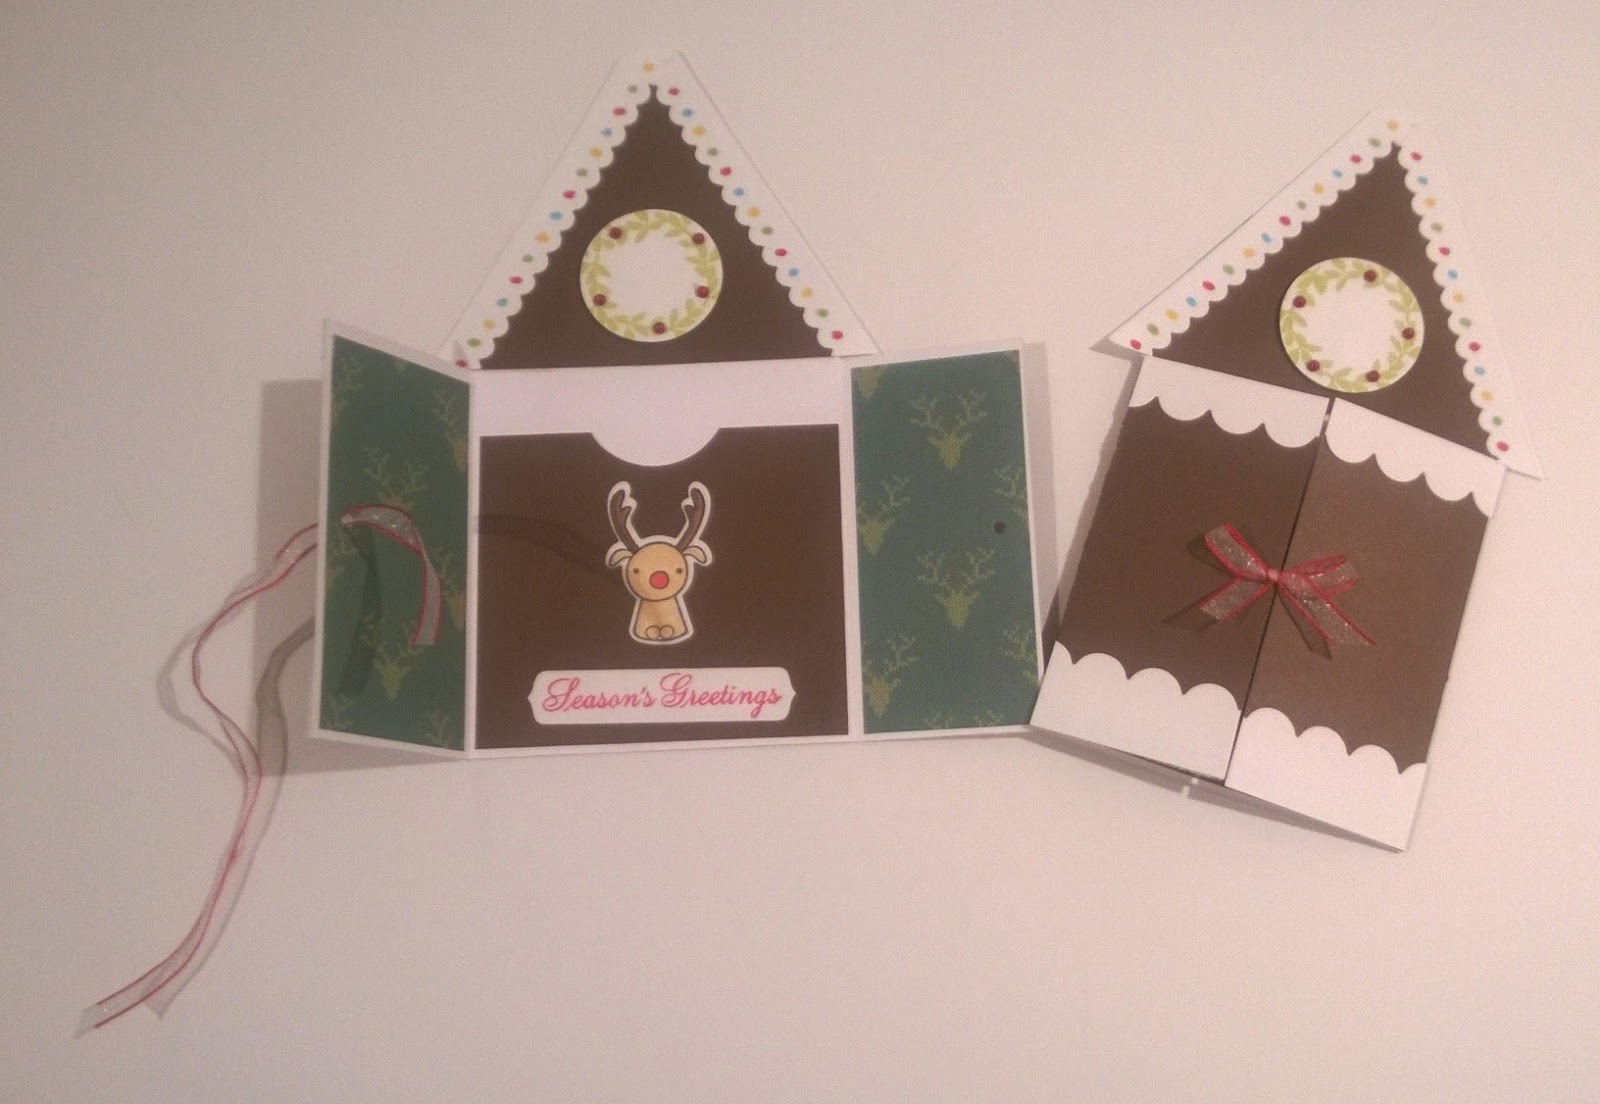
As I promised from my post on Sunday, here is the tutorial for the Gingerbread House Gift Card Holder.
Start out with a piece of 7" x 4" cardstock for the base of the house. I used the a|s French Roast cardstock. Score at 1-3/4" on both sides of the cardstock to make the doors.

Cut about 1/4" off the top of each door.

For the roof, cut a 4" x 3-3/4" piece of cardstock and cut a notch out from 2 corners.

(NOTE: it looks like there's a score line towards the bottom of the cardstock...it's not....it's just a shadow as I was taking picture)
Turn over the cardstock and use a pencil to mark a spot at 2" on the opposite side of the "notched" side (half the length of the cardstock). See the tiny mark I made on the right side of this picture?

Then, take the piece and angle it on your cutter to make a triangle shape. You can see in the pictures that I lined up the edge of the notched side to the 2" mark.


You should have a piece that looks like this:

For the gift card insert piece, I used a 3-3/8" x 3" piece of cardstock and used a circle punch at the top.

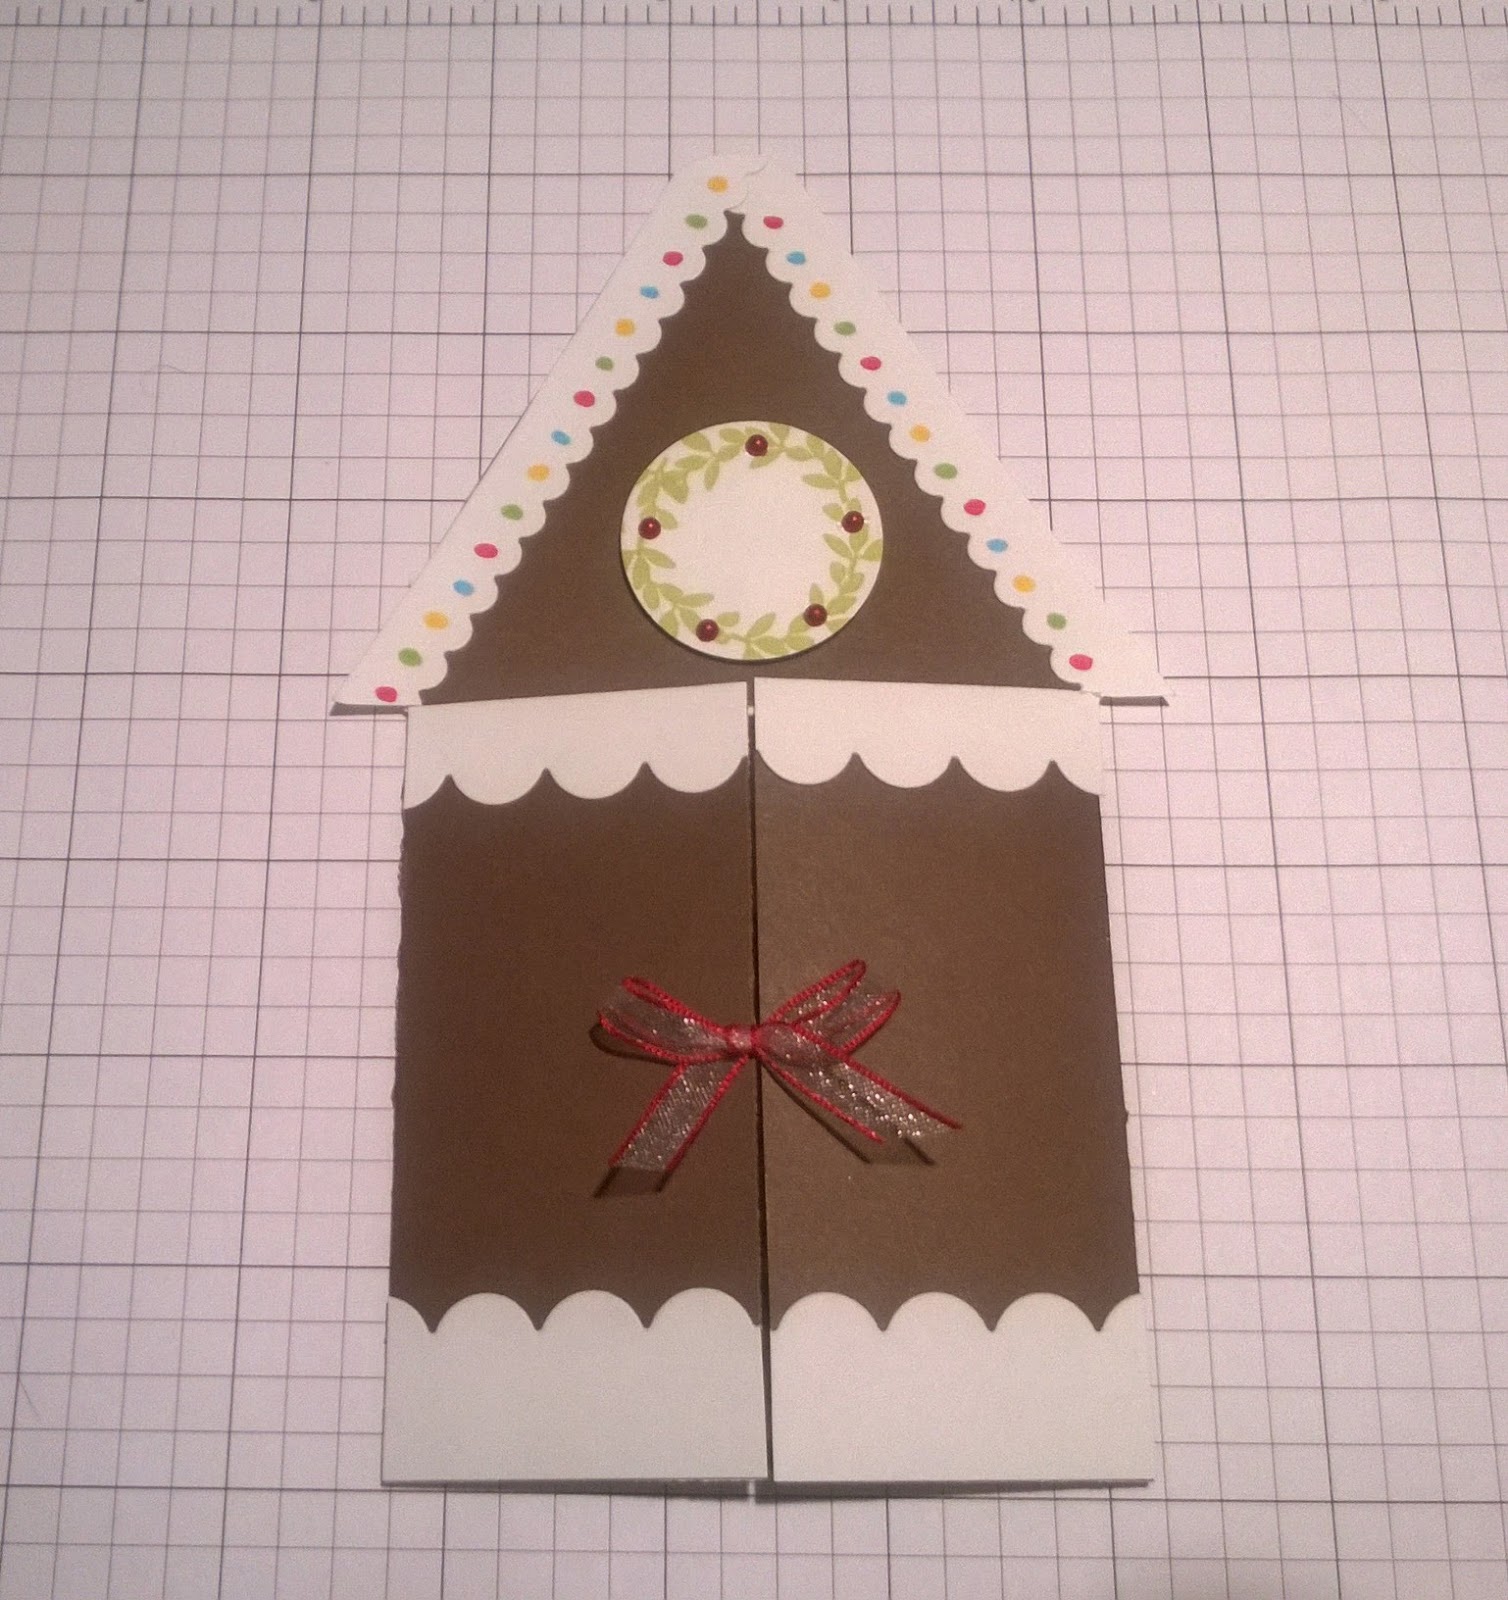
I used the Scallop Borders Die Set to make the "icing" for the house.


I started out adhering the smallest scalloped border to the edges of the roof, trimming off the excess.

I used the Corner Chomper (1/2" side) to round off the roof.
.jpg)
To make the house, adhere the roof to the base lining up the edges where the notches were cut.

Adhere the gift card insert.
For the icing on the doors, I used the medium and large scalloped borders. Adhering them and then cutting off the excess. Here' a tip: When adhering the scalloped borders, line up from the inside of the door out...so that the scallops line up.

I made the wreath out of a piece of Sugar cardstock that was punched out with a circle punch. I used of the the tiny leaves cluster stamp from the 2014 Holiday Hoopla Hostess Incentive Stamp set to stamp the wreath using Sage Ink.


I finished it off by adding some Cranberry Pearl Stickers for the berries.

I used foam adhesive on the wreath to adhere it to the roof.
I used the following Copics to add some color to the roof: R29 Lipstick Red, B02 Robin's Egg Blue, Y08 Acid Yellow and YG25 Celedon Green.

For the inside of the house, I used one of the patterned papers from the Christmas Sweater paper pack on the doors (panels are 1-5/8" x 3 5/8".

Then, I colored the cute reindeer from the Not A Creature Was Stirring set (with matching die set).

I used the following Copics:
R35 Coral for the nose
E59 Walnut and E57 Light Walnut for the antlers
E51 Milky White and E53 Raw Silk for the body

I used the sentiment from Bottle Brush Forest stamp set. I just loved the font. The sentiment was stamped with Berry Ink onto a piece of Sugar cardstock cut using one of the dies from the Word Windows Die Set.


To finish it off, I punched a couple holes on the doors to thread the ribbon through. I used the Cherry Organdy Sheer Ribbon.

I hope this tutorial was easy enough to follow.
Until next time....
Blessings,
Another clever and unique card - what a great way to show off the amuse papers...so cute!
ReplyDelete